Free & Fast Shipping Options In EU
Free & Fast Shipping Options In EU
About
Kegging Gear

Espresso Martini in a Mini Keg - Recipe and How to Guide
March 18, 2024 5 min read
Cocktails, especially espresso martinis are getting more and more expensive to buy when out and about, but what if you could make them easily at home and for cheaper? Well, we've got you covered with a easy to follow recipe and some tips and tricks to take your cocktail making to the next level.
The following recipe and instructions are for us with our Espresso Mini Keg Package. Our recipe makes around 14 martinis in our 2L keg, this can be easily increased for our larger 4L, 5L and 10L kegs.
Before getting started, it’s worth noting this recipe leaves around 300mL of empty space (known as headspace) in the keg which is important for ingredient mixing and for the nitrogen to dissolve. No matter how big or small your batch is, make sure to leave enough headspace in the keg, however leaving too much space will cause you to use much more gas to bring the keg up to pressure before it absorbs into the liquid.
Our recipe is as easy as can be, all you need is cold brew concentrate, vodka, kahlua and ice in a 1:1:1:0.4 ratio.
So for a 2L keg that would be:
-
500ml of cold brew concentrate
-
500ml of vodka
-
500ml kahlua
-
One tray of ice cubes
As long as you keep the ratio the same, you can increase or decrease this recipe with ease!
Method:
-
Make sure all ingredients are chilled and add them to your keg.
-
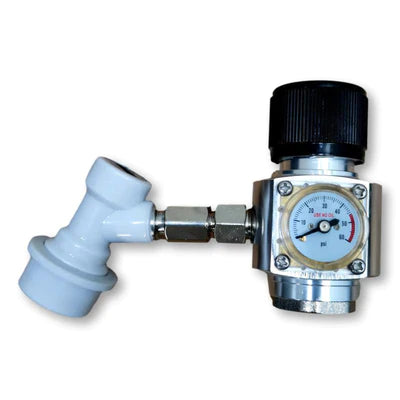
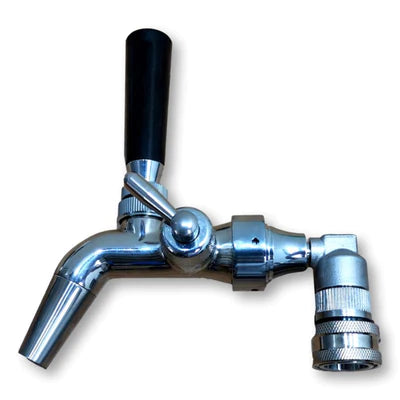
Screw in the tap and attach the regulator.
-
Make sure the regulator is off, screw in a nitrogen bulb and turn the pressure up to 40psi.
-
Shake the keg! The more nitrogen you can absorb into the liquid the better your creamy foam will be.
-
Turn the regulator off, remove the nitrogen bulb and attach another for serving, setting the pressure at 20psi.
-
Slowly press down on the tap button, the harder you press the faster it pours.
-
Drink and enjoy!
*The amount of nitrogen bulbs you need depends on how much headspace you have in the keg, how much gas you can absorb into the martini mix and whether you release the pressure before serving or just pour it.
Following the recipe above our 2L keg will need two nitrogen bulbs to dispense. You can also use nitrous oxide, or cream chargers, which are larger, 8g vs 2g, and although it absorbs into the liquid better the foam is less stable and more greatly affected by alcohol content.
If you’re looking to dispense larger quantities for events you can also connect our keg system up to larger nitrogen bottles, but you’ll need an adapter and gas line to do so.
How to Perfect your Espresso Martini:
If you want to get the perfect creamy foam on your espresso martini it’s important to follow the next steps to create the perfect condition for the nitrogen to absorb into your martini.
Successful Absorption requires:
-
Your liquid to be near 0 degrees Celsius for gas to start absorbing
-
The pressure needs to be high, at least 40psi, to push the gas into the liquid
-
Maximum possible surface contact between the liquid and gas
Chill to Perfection:
Make sure to chill all the ingredients before putting them into the keg, as the colder the liquid, the better the nitrogen can absorb into it. If you start with warm liquid the nitrogen will not dissolve until it cools down to zero degrees.
This is just as important for the keg, our black kegs are insulated and will stay cold all day. However the same can be true if it’s warm, if you put room temperature liquid in the keg and then try to cool it down it’ll take at least 24 hours before being cold enough to even begin to absorb the nitrogen. For the best results either chill your keg overnight before filling, or at the very least swirl cold water in the keg before filling with your chilled ingredients.
Since our recipe uses ice cubes make sure to prepare them in advance!
Absorb the Nitrogen:
Before starting, always make sure your iKegger 2.0 regulator is off before screwing or unscrewing your nitrogen bulb. This is important to remember when connecting or disconnecting the regulator from the keg as a sudden change in pressure can damage the regulator.
Insert the nitrogen bulb into the regulator and attach to the keg filled with your chilled martini mixture and ice cubes. Turn the pressure up to at least 40psi and shake the keg for 30 seconds. Shaking the keg, rather than swirling it, both mixes the ingredients and also increases the surface area that the nitrogen comes into contact with, helping it absorb into the liquid faster.
If your keg and martini mix are ice cold, and the pressure is high enough the nitrogen will slowly absorb into the fridge overnight, however shaking the mixture will always be more effective.
Pour like a Professional:
For pouring you can turn the regulator off, as it only needs to be around 20psi. The more pressure in the keg the harder it is to control the flow, as the pressure will cause more resistance when pushing on the button on the tap. With every drink served the button will become easier to press and your espresso martini will be easier to pour.
You can also release some pressure by pulling on the pressure release valve letting it drop to 20psi. Once the pressure has reached 20psi you can turn the regulator back on to keep it at a steady pressure.
To perfect your pour you can do a test pour into a glass to check how the foam is looking (also helping to reduce the pressure inside the keg). Your espresso martini should, instead of being the black liquid it started as, now be paler in colour. It will settle in the glass and form a dense creamy foam on top over 10-25 seconds. The lighter your martini is the more nitrogen that has been absorbed into it and the better and more stable the foam will be.
If you won’t be pouring any more drinks for a while, turn the pressure back up to 40psi while storing so that the nitrogen stays dissolved in your martini. If it’s been a couple of hours, (a day or even a week!) give your keg a good shake before serving.
Trouble shooting:
We’ve tested many different brands of coffee, premade concentrates and even made our own and not all coffee was created equal. Sometimes the foam will dissipate quicker than we want, and this is likely due to the oil content or strength of the coffee itself. We have a great cold brew coffee concentrate that always gives us great results.
If you wanted to use your own espresso or make your cold brew we have a guide on how to make great cold brew which you can find here.
If you’re having trouble getting the nitrogen to absorb into your martini mix, make sure you haven’t skimped on the ice! It chills the liquid and helps create a greater surface area, when shaking the keg, which makes it easier for the nitrogen to absorb. It will also help reduce the alcohol content as a higher alcohol content can impact the foam and cause it to dissipate quicker.
And that’s everything you need to know to take your espresso martini game to the next level so all that’s left to do is enjoy, cheers!
Subscribe
Sign up to get the latest on sales, new releases and more …


